Packing for a solo hike isn’t about tossing random gear into a backpack.
It’s about preparing for anything — especially when you’re the only one around to handle it.
Unlike group hikes, solo hiking demands more self-reliance, sharper judgment, and smarter packing. Every item matters. Bring too much, and you’re weighed down. Bring too little, and you risk being unprepared.
In this guide, you’ll learn:
- The must-have essentials every solo hiker should carry
- Optional extras depending on your personal needs and environment
- Smart tips to avoid overpacking or underpreparing
- How to pack light, efficiently, and safely — so you’re ready for anything the trail throws at you
Let’s dive into what to pack.
Know Before You Pack
Before you even unzip your backpack, there are a few key questions you should answer. These will shape what you pack, how much you bring, and what you can leave behind.
- What are the trail conditions?
Check the weather forecast and local alerts. Will it be hot and dry? Wet and muddy? This will guide your choice of clothing, layers, and even emergency gear. - What type of terrain will you be hiking?
A rocky, uneven trail may call for sturdier boots and trekking poles. A smooth, well-maintained path might allow for lighter footwear. - How long will you be out?
Your hike’s duration affects how much water, food, and battery power (for phones or GPS) you’ll need. A two-hour loop requires a very different setup than a full-day trek.
Asking these questions the day before your hike can make the difference between an enjoyable adventure and a stressful one. It’s the first step in packing light, packing smart, and staying safe.
Answering these upfront takes the guesswork out of packing. This will help you feel more confident before setting out.
If you are after more saftey tips. Our article Solo Hiking Safety covers this topic in depth.
Essentials You Should Never Leave Without
Now that you’ve checked the trail conditions and terrain. It’s time to pack your backpack with the solo hiking essentials. These are the non-negotiables and form the solo hiker’s core packing list. This is the gear that keeps you safe, fueled, and prepared. We’ll break this list into five categories to help you pack with confidence.
Navigation & Communication Tools
This gear helps you find your way — and be located in case of trouble.
- Map (paper + digital offline maps) – The point of having two independent map options is if one fails you have a backup
- Compass – This is great for getting your bearings. For instance you might be doing a north facing direction hike. But are unsure due to the changing terrain
- Phone with extra battery bank – This can be one of your primary means of navigation. Most maps are online these days. The battery bank will provide peace of mind that you can take all those photos and still have some left over to find your way home
- Personal Locator Beacon (PLB) or GPS tracker – These are two emergency signal options. They can be hired at certain outdoor shops. They will alert your in case of emergency contact.
Hydration & Nutrition
Too little food or water can ruin your hike. Too much can weigh you down. Aim for a balance:
- Water bottles or hydration bladder – A bladder saves effort on longer hikes. Insulated bottles work in heat but add weight.
- Water purification – If potable refills are uncertain, carry a filter Katadyn BeFree or purification tablets. A common option is link to lifestraw or the one I have.
- Main meals – Go for carb-heavy, portable meals like sandwiches. Choose what fuels your body best.
- Snacks – Lightweight, high-energy options like trail mix, jerky, or bars.
- Emergency rations – A little extra food is a smart hedge against delays.
First Aid & Emergency Gear
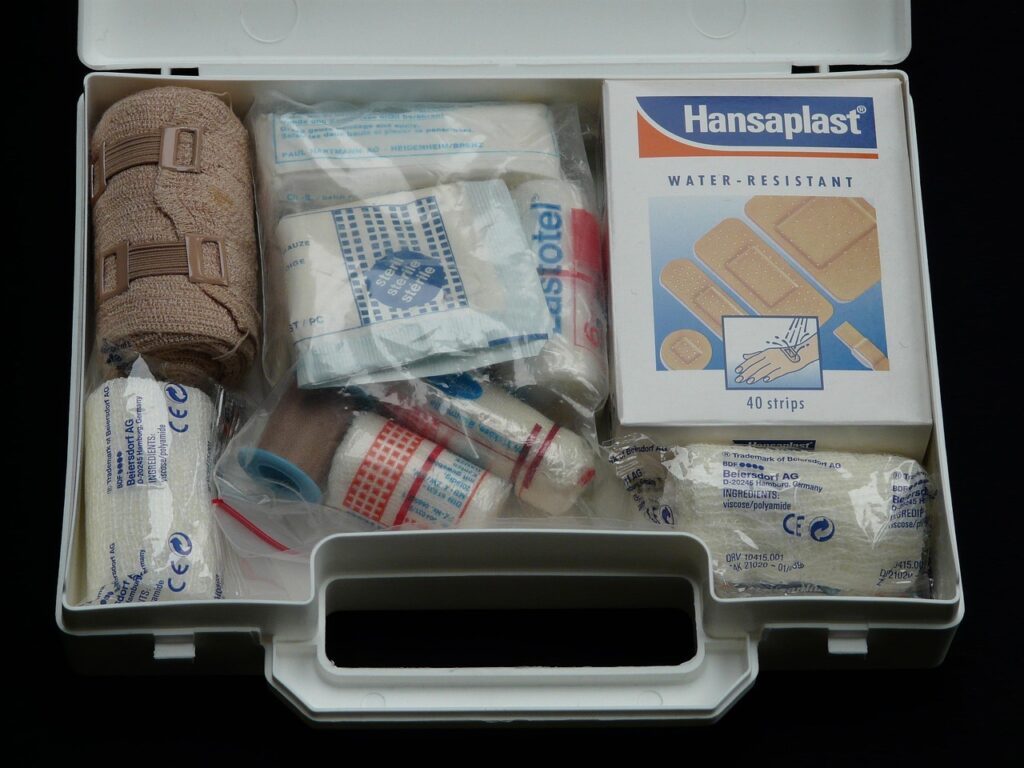
Accidents happen — here’s what you need to be ready:
- Compact first aid kit – Include bandages, plasters, antiseptic, and painkillers.
- Headlamp + spare batteries – For early starts or late finishes. Check battery life before you go.
- Multi-tool or knife – Use it for food, gear fixes, or unexpected problems.
- Strapping tape – A true MVP. Great for blister prevention, boot repairs, even patching gear.
- Lighter or matches – Handy for emergency warmth or cooking.
Clothing & Protection
Weather can change fast. Dress smart and layer up:
- Base layers – Merino or synthetic materials wick moisture and regulate temperature.
- Insulating layer – Down is light and compressible; fleece is bulkier but durable.
- Outer shell – A good rain jacket is worth the investment.
- Socks – Start with affordable options like Decathlon’s hiking socks, and always pack spares.
- Hat & gloves – Easy to stash and crucial in cold or windy weather.
- Sunglasses + sunscreen – Protect your eyes and skin, even on cloudy days.
- Bug spray – Optional but useful in certain areas.
Shelter & Comfort (for longer hikes)
For longer or multi day hikes you want to look at some overnight extras.
- Lightweight tarp or emergency bivvy
- Small foam pad or ultralight seat
- Toilet paper, trowel, and hand sanitizer
Now you have the essentials of what to pack. Let’s jump into how to pack these.
Smart Packing Tips for Solo Hikers
Over time, you figure out what works — and what you wish you’d done differently. These are a few packing tips I’ve picked up that make solo hiking smoother, safer, and more enjoyable.
Keep Essentials Accessible
Store snacks, maps, and your rain jacket where you can grab them fast — no digging needed.
Balance Your Load
Distribute weight, with heavier items close to your spine. Do a home test pack to adjust straps.
Use Dry Bags or Ziplocks
Keep electronics, spare socks, and food dry and organized. They’re cheap and work wonders in wet weather.
Optional Extras Based on Personal Needs
Now that you’ve got your core gear sorted, it’s time to think about the extras that make a hike uniquely yours. Every hiker has different reasons for hitting the trail. Some want to capture stunning photos, others crave a hot drink with a view. These personal touches aren’t essential for safety. But they can make your solo adventure even more enjoyable. Some optional extras could include:
- Lightweight camera or GoPro – For capturing memories or documenting your journey
- Trekking poles – Especially helpful for steep or uneven terrain.
- Journal and pen – Great for reflection or trip notes at the summit or camp.
- Compact stove and cup – Perfect for a warm coffee or tea with a view.
- Book or Kindle – Ideal for winding down on overnight hikes.
- Sketchbook and pencils – A creative way to record what you see and feel on the trail.
Everyone’s tastes and motivations vary, and that’s part of what makes solo hiking special. This is your chance to personalise your pack — have fun with it and make each hike truly your own. Next, let’s take a look at what not to bring.
What NOT to Bring
This is one a lot of us learn the hard way. I’ve carried several books on hikes and never read a single page. Overpacking adds unnecessary weight. This leads to faster fatigue and a less enjoyable hike. Here are a few common items to leave behind — and how to pack smarter.
- Multiple Books – Take one, or better yet, bring a Kindle or Kobo. That way you’ve got a whole library at your fingertips without the weight.
- Bulky Clothing – Stick with compact, lightweight layers. Think “multi-use” items and ask yourself: Will I definitely wear this?
- Heavy Tools – Most of the time, your boot or a rock will do the job to bang a tent peg in. Leave the hefty multi-tool or hammer at home unless it’s essential.
Rule of thumb: If you’re saying ‘maybe I’ll need this,’ you probably won’t. Leave it out.
Key Takeaways
We’ve covered what to pack, how to pack it smartly, what not to bring, and how to personalise your gear. Read about how to find the best multi-day pack here.
To make life easier, I’ve created a free printable checklist you can take on your next hike.